Monday, October 29, 2018

DIY Halloween Masks

Need a craft to fill ten minutes of boredom before dinner? This one is perfect! Easy, quick and mess free (unless your toddler colors on her face like mine did!)


I found these free printables at https://www.thesprucecrafts.com/free-printable-halloween-masks-1357668

We were planning a big "Breakfast for Dinner" meal but first, my husband was the sweetest and began to wash the dishes. Sunday's are always pretty hectic for us as the two older kids usually go to their dad's (or grandparents) for the weekend so the toddler is wide open when her older siblings come home! We find that some form of craft and "letting loose" period is the best way to get all of the kids back on track and ready for school the next morning. Last night, I knew I needed something to occupy the girls while Dad finished the dishes so I once again turned to my trust Halloween craft bag.

I had forgotten that I had printed these adorable masks about a week before and these were perfect!

Supplies:
Free Mask Printable (link above)
Markers/Crayons/etc
Scissors
Craft Sticks
Tape/Glue/Double Sided Sticky Patches

First, print out the free masks. Two masks come on each sheet. Then, let the kids pick which one they would like (and pick one for you to color too! Trust me, the kids have more fun when you join in).


Let their creativity fly! My youngest went full on crazy green/red scribbles but matches the Frankenstein mask that she picked. Once they are all done with coloring their masks, tape (or glue) the back to a piece of construction paper to give it a little extra strength. The next step gets boring for the kids to watch so I suggest printing a few coloring pages for them to have fun with while Mom (or Dad!) does the boring work.


Once you have the masks cut out (DON'T FORGET THE EYE HOLES!) then you can start putting on the stick to hold your fun masks up.

I left space (not taped) to adhere my stick. I used double sided sticky foam to attach the stick to the paper but you can use whatever you have on hand! Also, you can punch holes and tie string to make a wearable mask.


When you are all finished, hand them back out to the kids and get your camera ready for a fun photo op!


Happy Halloween & happy crafting!

{Sarah B}

Easy Spider Web Craft

Easy Spider Web Craft Instructions


Children tend to like simplified crafts and games and sadly I've seen a lot of craft ideas that are over complicated for the young ones. This is not one of those! I originally found this craft idea on Pinterest and I loved the idea of using string to make the spider webs but this proved a little too hard for my two year old so I fished through my Halloween craft bag and found that fun pipe cleaners were a much better fit for her and way more fun!

(Yes, I have a huge craft bag for Halloween! Don't ask how many bags/boxes/etc I have for crafts in total!)

Supplies:
Craft Sticks
Elmer's Glue
Pipe Cleaners
Spider Rings

Short list right?! You can of course add anything extra you would like or use string to make them look differently. Just an example of some of the most commonly used supplies in my blogs is below (Cat not included!)


For this craft, you want to start with three craft sticks and glue them in a star shape. LET DRY FOR AT LEAST THREE HOURS! You want these to be secure before you let the little ones start pulling and tugging on them!

After the glue is set, let the kiddos pick out their fun colors of pipe cleaners. I used one pipe cleaner for the middle of the our webs and two for the outside. You can stick to one color or go crazy with three, 100% up to you and the kids! 

(This one done by my 7 year old)

There is no set way to twist these on. Just twist until secure! After your web is finished, twist a fourth pipe cleaner to the back of the ends to your outer web to hang! For a final touch, take one of those left over spider rings (like in my previous blog) and simply put around one of the sticks!

And done! Cute spider web crafts that the kids love!

The crazier, messier, all over the place the better!

(Below: my 2 year olds web)


Let them go to town and don't stick to any rules! 

Enjoy your bonding time and a mess free craft!


Happy Haunting!


{Sarah B}

Thursday, October 25, 2018

Spookify Your Home

It's no surprise that I love Holiday's and love to decorate for them even more. Halloween as a kid was a magical time were we could truly believe we could be anybody/anything we wanted, enjoy ringing in the fall season, having fun with harmless spooky family decorations/movies and the best of all...Candy!!!

The time old argument is whether Halloween is an evil holiday has become so hum-drum to me that I ignore it nowadays. Instead, I embrace what I know and that my ancestors were one of the first to celebrate this now beloved holiday. A few years ago, I celebrated by teaching my children some of the old Scottish traditions surrounding the holiday and the fall season but this year, I'm keeping it Americana. It's important to me to not only celebrate where you distant ancestors came from but also your closer families traditions. One of the biggest parts of Halloween tradition to me is to of course, decorate!

I would say the scarier the better, but being a mom of a toddler and two older kids that are a little on the sensitive side (or at least were in the past), I don't believe that's the best of ideas right now but, trust me when they all get older...our house will be awesome! For now, we still have our scary/spooky aspects but the most important part is to let the kids partake in the raising of the decor and to spookify our home! I have to say, my husband is such a good sport! I'm not sure whether he actually enjoys the decorations as much as I do or if he just enjoys the stops, stares, ooh's and ah's from the neighbors but, he really helps out a lot! As a matter of fact, when he's not here I find the kids and I just do bare minimum and leave it at that!

The hard truth is, no matter what we are going through, where we are living or how much/little we have we will always find a way to make any holiday happy and celebrate that we are here for another year! So, below are a few tips to help spookify your home this haunted holiday season!


There's my silly oldest and youngest posing the night they created the "haunted graveyard" in the front yard. They were both so excited and great sports to partake in putting all of the decorations up for the SECOND TIME! The double hurricanes hitting our state made it difficult and we were very late in the game putting up all of the outdoor decorations.


FOR INDOORS:

Try to keep it moderately simple. Outdoors is for the "crazy all over the place" decor. Inside should be kept minimal but still reflect your personality and likes! For instance, this year we acquired my grandmother's piano (that she had been asking me to take for over ten years). We also found out that this beauty is over 120 years old! So what better way to show off its new home than to make it a "haunted piano"...figuratively speaking of course. Let's hope it's not really haunted!


It's kind of a scramble of objects this year because we just adopted two kittens and the LAST thing I wanted was their tiny claws on the piano so the very top shelf is adorned with beloved items and my viola to deter them from climbing up there!

But, the second shelf took on a whole new life when I decided to make that our "haunted piano" focus! I started with placing decorations that I absolutely did not want the toddler to get a hold of! Next, I arranged and rearranged all of the decor several times. Try to place the taller objects on either end and the middle to give focal points. Then place smaller objects next to/in between. Finish off with the tiniest of decor in the front. Lastly, have some fun with those cheap spider webs from the Dollar Tree! Stretch, stretch, stretch those pesky webs until see-through! The stringier the better!


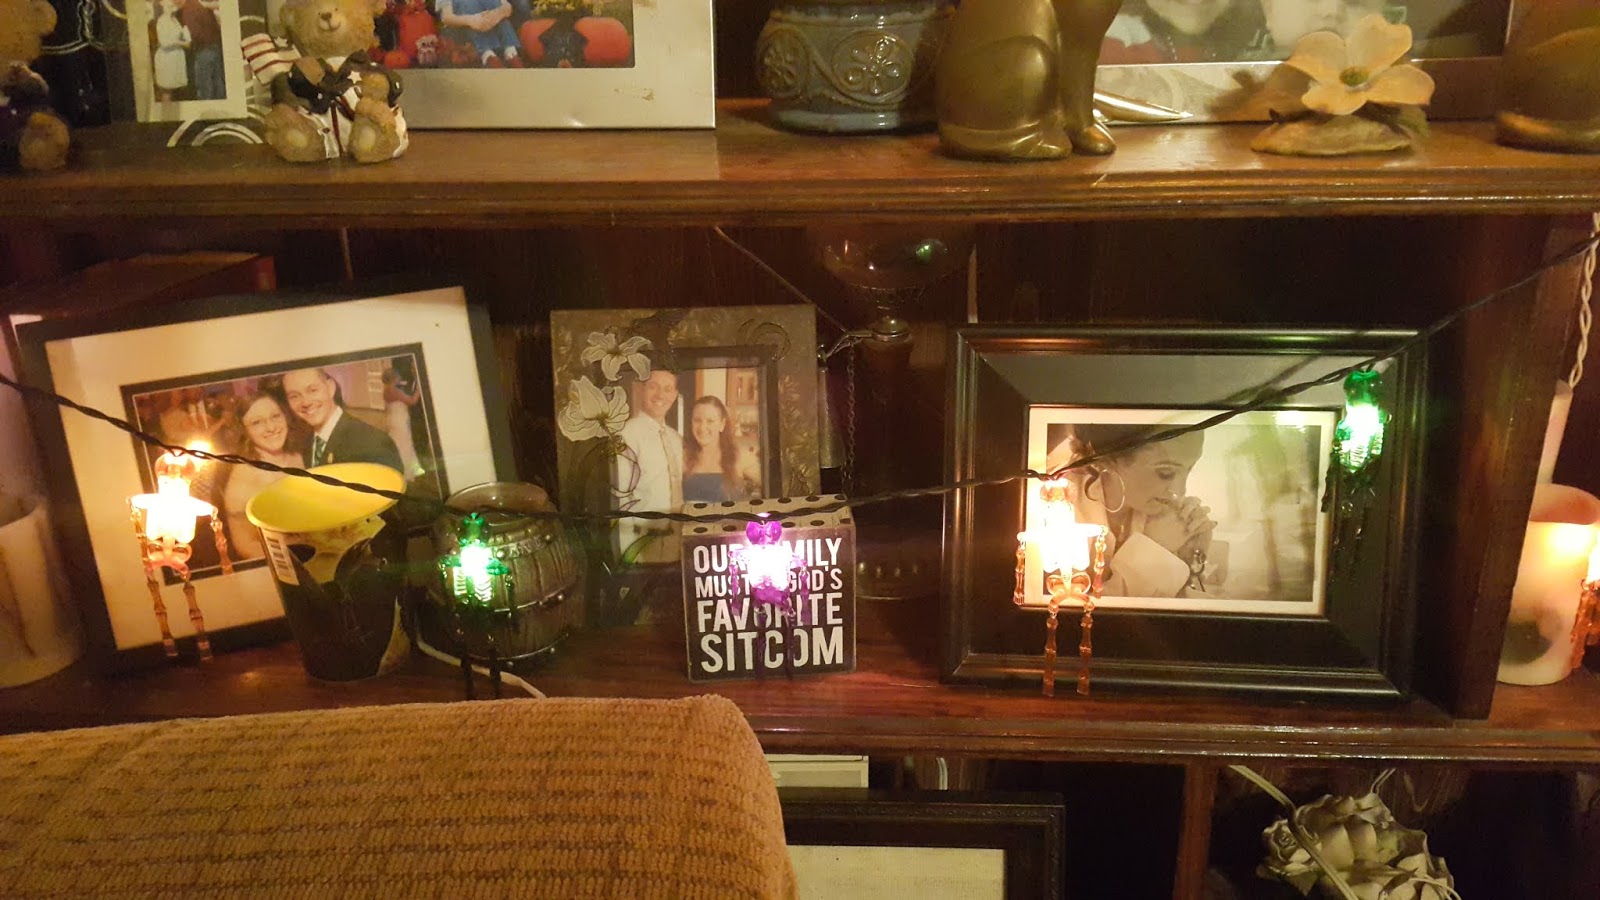
Now for the fireplace (if you have one). If you don't...who cares?! Pick your main focal point for your living room/any room and start there! For ours, I kept it simple. I placed a few candles on top of the fireplace mantle, strung cute ghost/pumpkin lights from the bottom with Halloween garland, hung witch signs/caged skeleton on either side and finished it up with purple string lights which I ran from under the fireplace through the other lights. We also have a bookshelf to the left of the fireplace so why not add more to connect to the same power strip?! A glowing pumpkin on the wall + a string of skeleton lights sums it all up. It's such a beautiful sight when all of the lights are off at night!


After you finish your main points in your room, add a few extras to other parts! For our home, I added a battery operated mummy light string to the entrance of the dining room. So cute and super fun!


I then added a few small bits of Halloween decor and a witchy night puzzle that I had glued a few years ago to the back wall (aka my big cat wall)!


Also notice on either side of the piano I added spooky black netting to my lamps. A much loved extra!


Main room done! For extra fun, add other decorations throughout your home! I added a fun lantern handing from our dining room chandelier, window clings to the back door plus many other small fun items through the rest of the house!


Bottom line, have fun! Don't over do it indoors. Save that for outside! Make it look like Halloween threw up in your yard! Just kidding! Don't do that! Instead, go based on your landscape! Every year we do something different with ours and we add new stuff constantly! It keeps it exciting not only for us but also for our neighbors/friends!


Happy decorating!!

{Sarah B}

Boo-for One Halloween Kids Crafts

Tonight I'm giving you all a boo-for one of children's Halloween crafts (AKA two-for one). Since Halloween is now less than a week away, we are doubling up on our crafts, especially if they are small in nature. The two crafts I'm highlighting tonight are super easy and the kids had a blast! Links to BOTH free printables will be listed!

Tonight's boo-for one crafts are:
Pose-able Hanging Skeleton


Halloween Color Fun Mobile


Like all of my blogs, my biggest tip is to put your own spin on it and have lots of fun! Watch those babies of yours grin and laugh as they get crafty!

First up is the Pose-able Hanging Skeleton
Supplies:
Free printable (listed below)
Scissors
Brads
Cord/String

I searched Google to find the perfect DIY skeleton printable. I found a lot of cute ones but the one I ended up choosing was the perfect fit for my kids! Not only that, her blog is amazing and has a lot of great ideas so please click below, check it out and sign up!

http://www.printables4mom.com/2016/10/04/9-printable-skeleton-crafts/

Once you have however many copies you want for your kiddos printed, start cutting!

You can let them cut them or cut them yourself. Tonight they were wanting me to cut them because they were worried they would mess them up (as if!). I especially love that this printable had dotted lines around the skeleton to make it MUCH easier to cut!


ADVICE: This may sound strange but it's true! Have several different pairs of scissors in your home! Dedicate one for paper, one for fabric, one for kitchen necessities, one for everything else and several safety scissors for you young kids! When it comes to cutting paper especially, dull or nicked scissors will rip the paper in all sorts of horrifying ways!

Once you have your skeleton(s) pieces all cut out, hand them out to the kids! I gave them each just a pile of bones for them to figure out what goes where. (I opted the two year old out of this one because she was more into snack time and watching the older ones even though, I would have LOVED to see how she put this together! Maybe for another day!)


I honestly expected my oldest to go crazy wonky with this and put bones in incorrect order on purpose BUT he put them exactly where they should go.

We used brads for ours (you can use whatever you want/have to connect the pieces) but, the reason I chose brads was 1) I had tons from previous projects and 2) they allowed the skeleton to be better posed as much as they wanted!


I had the kids make their own holes by poking the back of the brads through the paper to connect the joints. For younger kids, you can always use a pencil to pre-poke the holes for them!

Then, sit back and watch the magic unfold!

These two had the best time taking extra brads to decorate them and make them sing/dance/play when they were finished!


When everyone is satisfied with their work, punch holes in the head (I used a hole punch for that part), thread some string through it and hang it! We chose our beloved Halloween tree to hang them on for a perfect touch. Then let your kids pose them exactly as they want and take pictures!

The oldest chose to give him a "beard" & eyes:

While my little princess made hers into a girl with a necklace & posed her to match!


Ooooooh! Spooky easy craft!!!

Our final craft for the day was the Halloween Color Fun Mobile.


This free printable was provided by the awesome site:
https://www.firstpalette.com/tool_box/printables/halloween.html

We started this one by simply printing the pictures (comes with two), cutting them out and then busting out the markers!

You can use any coloring staple you have! I chose the Crayola washable fat markers to make it easier on my two year old but any will do!

As any of you parents with toddlers know, their attention stays on something for two minutes if you are lucky! I could have gone over her coloring to make it more extensive but...WHY?! THAT'S exactly what she wanted hers to look like and that's FINE BY ME! Creativity is key! Let them have fun!


Now, for my older girl, she was determined to have them perfect with perfect colors! Her choice!


Once the children were satisfied with their coloring of choice, I took over cutting the characters out. (Again, you can let them cut them out with safety scissors of course but I took over tonight!)
Once your pieces are cut, punch holes in them (chose a simple hole punch again), thread them with string and if you are like me, send the teenager outside to find a stick!

I was pleased, he chose a perfect stick to hang the girls masterpieces on!

There is no set instructions for the final part. Hang them however you like! Hang them on a tree, hang them from a chandelier, tape them to the door, tape/hang them in a window, or choose a rustic stick and hang them like we did!

I simply tied them onto the stick then hung the mobile from the ceiling! Done! And the kids LOVE seeing it to the entrance of the kitchen!


When all was said and done, we had an awesome afternoon/evening laughing, smiling & crafting. Everyone was involved in different ways and I loved the time with them!

Have fun, Happy Halloween & have a Boo-tiful full moon night!!!

{Sarah B}

Tuesday, October 23, 2018

Smell Like Fall! (DIY SIMMER POT)


I don't know of a single person who doesn't like fall smells! (If you are one of those...go to another blog!) Pretty much any kind of autumn smell that you can think of, I like. So, naturally I've been doing the simmer pot trend for a few years now. Most of the ingredients I usually have on hand, besides oranges and apples...those don't last long in my house.

Now, if you are like me you have probably seen, searched, or even tried simmer pot recipes from the internet and, probably unlike me you've had great success. As for me, it's been a lot of trial and error so I'm finally going to break down the simmer pot tribulations so (hopefully) you don't have the smell of burning fruit throughout your home!


DIY FALL/AUTUMN SIMMER POT INSTRUCTIONS:

INGREDIENTS:
1-2 Oranges
1-2 Apples
Cinnamon Sticks
Cinnamon Powder
Whole Cloves
Nutmeg
Orange Peel
(optional: chamomile & echinacea purpurea (aka purple cone flower) herb)

I'm sure you are wondering why some of the following ingredients are on the list above. I will explain that shortly. But first, grab a big pot (or slow cooker as I did this go round).

For me, I've done & tried this fall simmer pot on the stove with a small pot, a medium pot and even a big pot. There are a few reasons I didn't like any of them:
1) it costs more for me to run my stove top than it does to run my slow cooker
2) the water evaporates much faster on the stove top
3) the chance of burning your concoction is way higher (done that...it stinks to high heaven...trust me!)

Of course, you can choose whichever way you want but I do recommend staying close by if you are using a stove top method!

Once you have your heater of choice, slice the orange(s) and apple(s). I only used one of each for mine which works great!

Once you have sliced everything, place into your pot.

Next dump, sprinkle, dust your extra ingredients into the pot.


I LOVE the smell of cinnamon so on top of the 6-8 cinnamon sticks I threw in the pot, I also sprinkled a bunch of cinnamon powder into the pot as well (I even added extra after the first hour). This part will be all up to you depending on which smells you like best! I also added orange peel to mine for extra oomph as well as nutmeg, ginger & chamomile flowers.

Chamomile?! I know, I know. It's strange but, chamomile flowers are known to boost happiness and calmness so why not throw that in there? (FYI: it doesn't change the smell of your mixture)


Also, if it's cold and flu season (which seems like every season is now!) you can throw in some Echinacea Purpurea herb which is good helping your body fight off colds and flu's. Again, won't change the smell of your pot but will release the natural goodness through your home.


I'm a firm believer in natural oils and herbs helping your body and spirit. You can 100% omit this BUT if you do care to try it, they can be found on Amazon!

Once you have everything that you want in your pot, add water.

Most posts I've seen say add water just until it's on top of the ingredients but let me tell ya....these suckers float! So nix that idea. Instead pour water until they are gently floating (you can always add more later if you want).

Final step, turn on your stove or like me your crock pot!

It takes about 20-30 minutes to really start smelling everything as they heat up but it is WELL worth the wait!

For crock pots: use the high setting without the lid.
(I tried "warm" and "low" to no avail. The smell wasn't strong at all)

For stove top: use medium to low/medium setting or you will be boiling and burning your fruit!

My crock pot concoction on High lasted 7 hours! (no extra water needed) But similar simmer pots on the stove lasted 2-3 hours before I had to add more water.

Depending on if you are using it just as a rainy day smell good or for a party, you can decide how long you would like to simmer it.


Sit back, read a good spooky book and enjoy the smells of the season!!!

*ADDED: If you would like to know how to make the book knife rack in the background, stay tuned!)

Happy Fall! Until next time,

{Sarah B}